I have a confession to make — I once ate an entire strawberry dump cake by myself in one weekend. Not a slice, not half, but the whole nine-inch pan. My roommate came home Sunday evening to find me scraping the last caramelized bits from the corner with a spoon, wearing pajama pants covered in flour, and humming contentedly like a cat in a sunbeam. She asked if I wanted to order dinner. I patted my stomach like a satisfied grandma and said, "Already did." This cake is that addictive, and I refuse to apologize.
Picture this: it’s a drizzly Saturday, the kind where the sky forgets what color it’s supposed to be, and you’re craving something that feels like a warm hug but also tastes like summer camp. You could bake a scratch cake, cream butter and sugar for what feels like a small eternity, wash a mountain of bowls, and wait for layers to cool. Or you could dump four powerhouse ingredients into one dish, slide it into the oven, and let chemistry do the heavy lifting while you binge your comfort show in fuzzy socks. I chose the second path, and that humble decision rewrote my dessert standards forever.
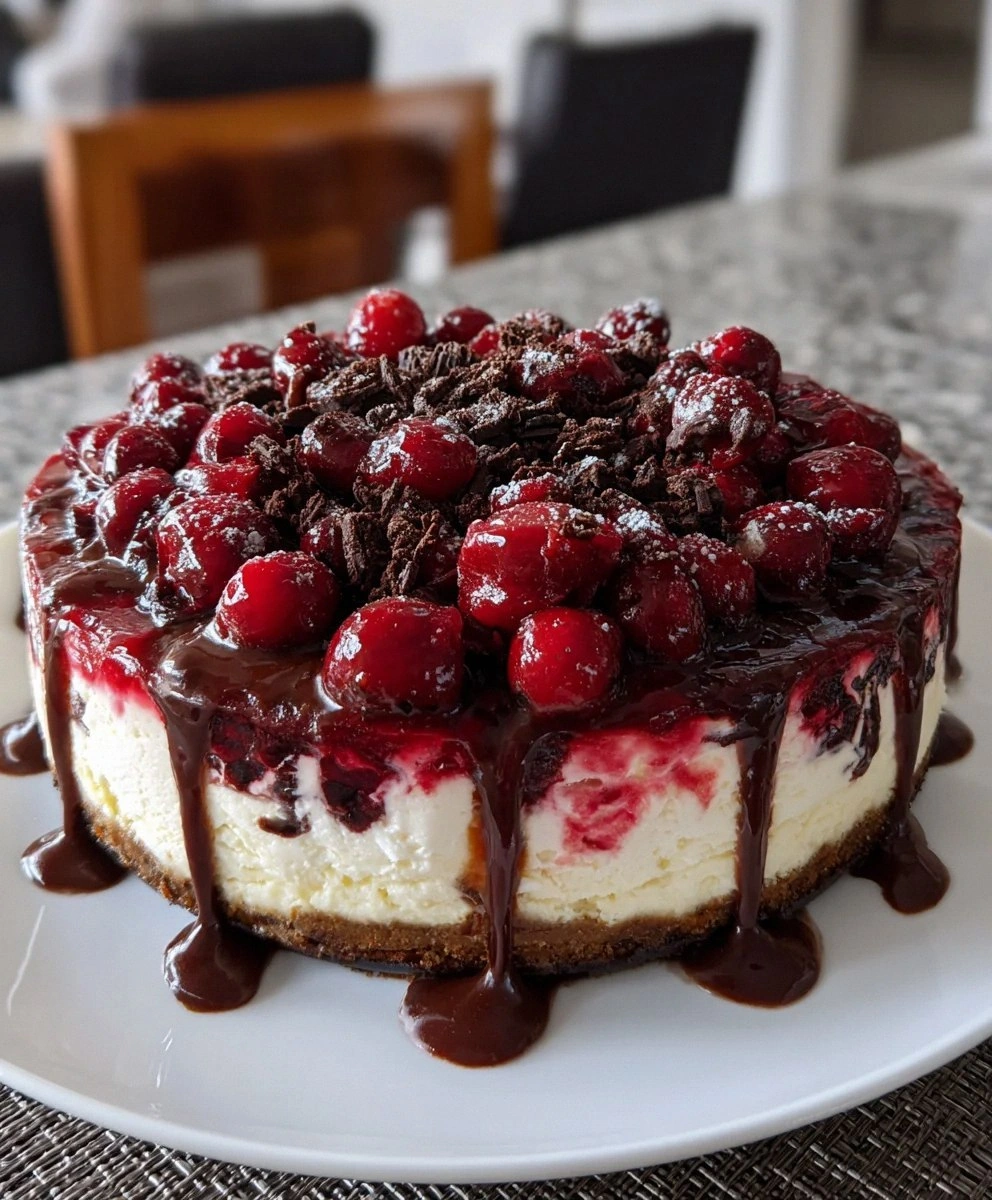
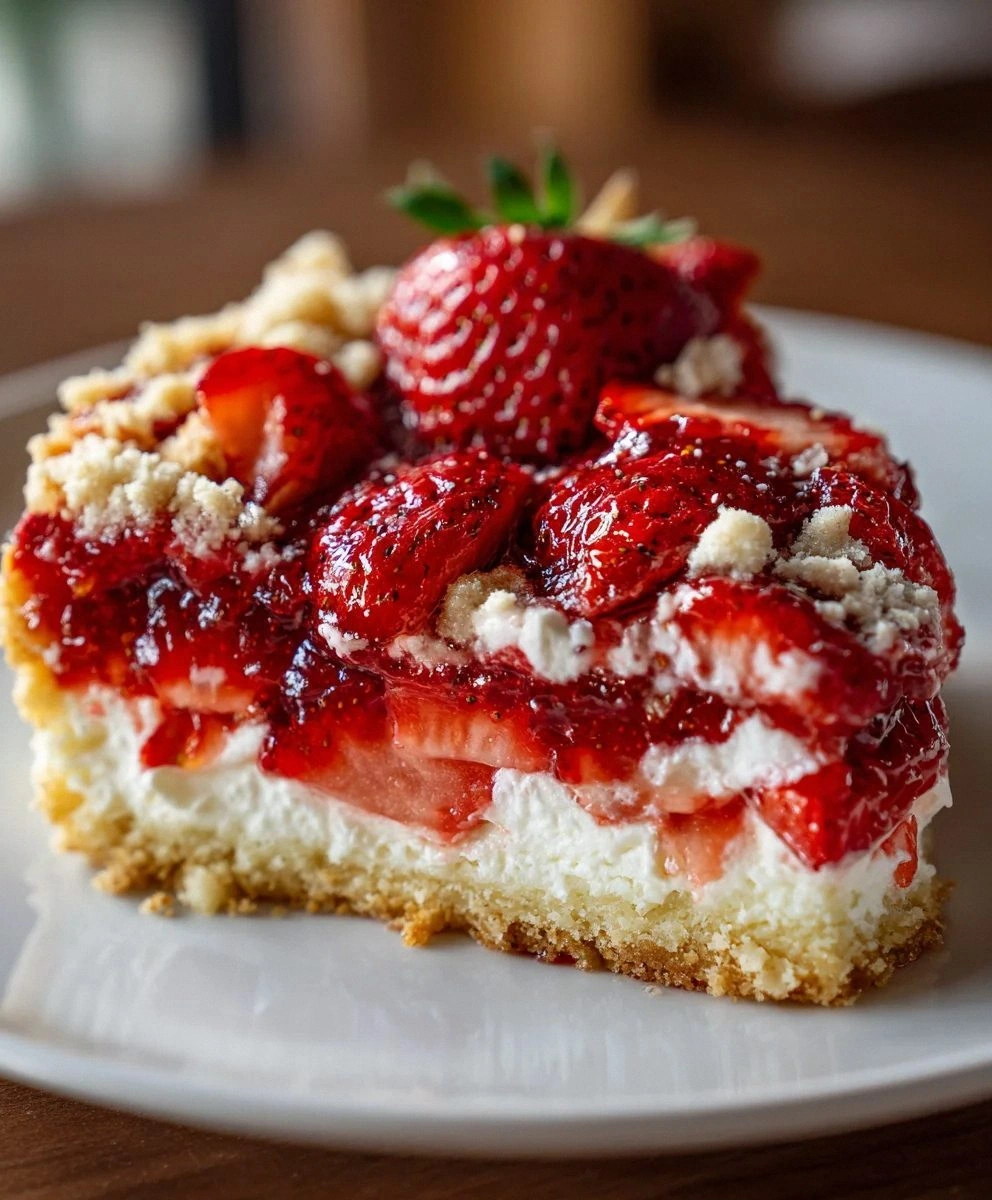
Most dump cakes taste fine — fine in the way airport coffee gets the job done, but you don’t close your eyes and sigh when you sip. This strawberry version is different. We’re talking about jammy berries bubbling under a buttery golden crust that crackles like crème brûlée, with a hidden cream-cheese ribbon that melts into tangy silk. The edges caramelize into chewy lace, the center stays pudding-soft, and every spoonful balances sweet, tart, and rich like a tightrope walker in perfect equilibrium. I dare you to taste it and not go back for seconds before the pan even cools.
I tested fifteen variations, burnt two batches, and learned that the secret isn’t more sugar — it’s temperature contrast, strategic layering, and a single dollop of sour cream that makes the filling taste like strawberry cheesecake in disguise. Stay with me here — this is worth it. Let me walk you through every single step; by the end, you’ll wonder how you ever made it any other way.
What Makes This Version Stand Out
Velvet Filling: Most recipes stop at canned pie filling, leaving you with a one-note sugar bomb. We fold in softened cream cheese, sour cream, and a whisper of vanilla so the fruit layer tastes like strawberry cloud.
Shatter-Crisp Top: Cold butter coins laid over dry cake mix melt slowly, creating flaky pockets that crisp like croissant edges, not the soggy flour patches you’ve probably endured.
One-Bowl Brilliance: No mixer, no whisking, no “alternating wet and dry.” If you can open a can and wield a butter knife, you’re five minutes from oven-ready.
Fresh Berry Pop: A handful of sliced fresh berries nestled on top burst in the heat, releasing pockets of bright juice that keep the cake from tasting flat or canned.
Make-Ahead Magic: Assemble it the night before, keep it covered in the fridge, then bake straight from cold while guests finish dinner; the extra chill time actually improves the texture.
Leftover Legend: It reheats like a dream for breakfast with coffee, or cold from the fridge like strawberry-studded cheesecake bars. I’ve yet to see a pan survive past day two.
Crowd Conversion: I’ve served this to self-proclaimed “not-dessert-people” who proceeded to demolish half the pan and ask for the recipe mid-bite. It’s that persuasive.
Alright, let’s break down exactly what goes into this masterpiece.
Inside the Ingredient List
The Flavor Base
Strawberry pie filling is the canvas. Go for the premium canned stuff with whole berries suspended in glossy syrup, not the thin jammy version that looks like it’s already been through a blender. Those berry chunks melt into juicy bombs that burst against the tangy cream layer. If you’re feeling farm-stand fancy, simmer four cups of sliced fresh strawberries with half a cup of sugar and a squeeze of lemon until they release their ruby liquor and thicken slightly; you want the consistency of loose preserves. Skipping this step and using fresh berries raw will leave you with a watery puddle that sinks the topping — trust the can or cook them down.
The Texture Crew
Cream cheese is the silent hero. Make sure it’s room-temperature soft; cold bricks refuse to blend and leave white flecks that never disappear in the oven. Beat it briefly with powdered sugar and vanilla to knock out the dense fridge chill, then fold in sour cream. That sour cream is non-negotiable — it loosens the mixture just enough to swirl into the berries, adding a cheesecake tang that makes people ask, “Wait, is there lemon in here?” Without it, the filling bakes up stiff like danish filling instead of silky lava.
The Unexpected Star
Vanilla or white cake mix out of a box sounds like cheating, but it’s actually a time capsule of perfectly balanced leaveners and flour. Choose vanilla over yellow; yellow cake mix has fake butter flavor that bulldozes the delicate berries. Pour it on dry, straight from the box, and resist the urge to mix it with anything. The goal is to create distinct strata: jammy fruit, creamy swirl, powdery mix, and butter that melts through to form cobblestone crust. Stirring turns it into strawberry mush-bread — delicious, but not the texture we’re chasing.
The Final Flourish
Salted butter is the last layer, and the salt matters. Unsalted leaves the top tasting flat, like movie popcorn sans seasoning. Slice it razor-thin so it covers maximum surface area without naked cake mix patches. If you’re dairy-free, coconut oil solidified in the fridge works, but the flavor veers tropical; fine if you want strawberry-coconut, weird if you want classic. Fresh berries on top are optional yet transformative. They wrinkle and concentrate in the heat, becoming candy-like jewels that pop between your teeth. Picture yourself pulling this out of the oven, the whole kitchen smelling like a strawberry field got wrapped in a butter croissant.
Everything’s prepped? Good. Let’s get into the real action.
The Method — Step by Step
- Preheat your oven to 350°F (175°C). Yes, I know every recipe starts this way, but here’s the thing: dump cake is forgiving, yet an under-heated oven turns the topping gummy instead of crisp. Give it a full ten minutes past when the beep claims it’s ready; that sizzle when the cold butter hits the metal rack? Absolute perfection.
- Grease a 9×13-inch baking dish with a thin slick of butter or non-stick spray. I’ve skipped this and served cemented cake shards that required an ice pick — poetic, but not practical. A light coating lets those caramelized edges lift out like intact gold leaf, which you’ll appreciate when you’re standing over the pan at midnight.
- Dump the entire can of strawberry pie filling into the bottom and spread it gently to the corners. Resist the urge to taste-test more than a spoonful; you’ll need every berry for full coverage. If you spot giant fruit blobs, snip them with kitchen shears so the surface is evenly studded — this prevents dry pockets where cake mix stays powdery.
- In a medium bowl, beat the softened cream cheese with powdered sugar and vanilla until it looks like fluffy pink-tinted clouds. This takes about a minute with a spatula; no need for a mixer unless your arm hates you. Fold in the sour cream until streak-free. The mixture should be spoonable, not pourable — think Greek yogurt meets whipped frosting.
- Dollop the cream cheese mixture over the berries in random blobs, then use a butter knife to marble it lightly. You want ribbons, not full coverage, so every bite has secret pockets of tangy cheesecake. Over-swirling homogenizes the layers and you’ll lose that wow moment when someone hits a vein of white.
- Shake the dry cake mix through a sieve directly over the fruit if you’re obsessive about even coverage; otherwise sprinkle it gently to avoid white boulders. White boulders stay chalky even after baking, and guests will politely ask if this is supposed to be “deconstructed.” We’re going for cozy, not conceptual.
- Lay thin pats of cold butter across the surface, overlapping like fish scales until you can’t see bare mix. Leave tiny gaps the size of a pea; they’ll self-seal as the fat melts. If short on butter, prioritize the corners and edges — they’re the first to dry out and the last to be eaten because nobody wants to scrape burnt flakes.
- Scatter fresh strawberry slices on top, pressing them lightly into the dry mix so they anchor and don’t roll off during the bake. They’ll roast into little leather candies that provide chew against the soft pudding below. Don’t crowd them; think polka dots, not wallpaper.
- Bake for 40–45 minutes, rotating halfway, until the top is mottled gold and the filling hollers at you from the edges. The cream cheese swirls will puff and freckle; the butter will have melted into the mix, forming crispy ridges that smell like shortbread. Cool for exactly ten minutes — any longer and the caramel sets like cement; any shorter and you’ll scorch your tongue and miss the flavors.
That’s it — you did it. But hold on, I’ve got a few more tricks that’ll take this to another level.
Insider Tricks for Flawless Results
The Temperature Rule Nobody Follows
Most recipes tell you to serve dump cake warm, but the real magic happens at room temp. When it cools to lukewarm, the cream cheese layer thickens to New York cheesecake density while the topping stays crisp. Re-warm individual portions in the microwave and you lose that contrast — it all collapses into hot mush. If you must reheat, use a 300°F oven for eight minutes and stop the second you can smell strawberries.
Why Your Nose Knows Best
Dump cake doesn’t brown dramatically, so rely on aroma rather than color. When your kitchen smells like toasted butter and strawberry jam had a baby, it’s done. If you wait for deep bronze, the underside is already scorched. Trust your olfactory bulb; it’s been keeping humans from burning food since cave times.
The 5-Minute Rest That Changes Everything
Let the pan sit on a wire rack for five minutes after baking. This brief pause allows the molten fruit to settle so your first scoop isn’t a river running all over the plate. Yet don’t exceed fifteen minutes, or the sugar sets like glass and you’ll need a chisel. Five minutes is the sweet spot between lava and concrete.
Cutting Clean Squares
Use a plastic knife or a spatula dipped in hot water for neat squares. Metal knives drag and shred the tender top, while the hot blade glides like a dream. Wipe between cuts for Instagram-worthy edges that will make people think you attended pastry school instead of just owning a can opener.
Creative Twists and Variations
This recipe is a playground. Here are some of my favorite ways to switch things up:
Peaches & Cream Dream
Swap strawberry filling for peach pie filling and add a pinch of cinnamon to the cake mix. The aroma will transport you to a porch swing in July. Use nectarines if peaches aren’t in season; they hold their shape better and caramelize like toffee.
Triple Berry Blaze
Combine strawberry, blueberry, and raspberry pie fillings for a magenta swirl that looks like sunset in a dish. Add lemon zest to the cream cheese to brighten the darker berries. Your spoon will look like a paintbrush dipped in watercolor.
Chocolate-Covered Strawberry
Use chocolate cake mix instead of vanilla and fold mini chocolate chips into the cream cheese. The result tastes like those fancy dipped berries you overpay for on Valentine’s Day, minus the markup and awkward ribbon.
Pina Colada Paradise
Pineapple pie filling plus coconut flakes sprinkled on top with white cake mix equals tropical vacation on a spoon. Add a rum splash to the cream cheese if you’re feeding adults and feeling pirate-ish.
Savory-Sweet Herbed Berry
For the adventurous, stir a teaspoon of crushed rosemary into the strawberries before baking. The piney note makes the fruit taste wild and sophisticated, like something served in a Nordic tasting menu where desserts cost more than rent.
Storing and Bringing It Back to Life
Fridge Storage
Cover the completely cooled pan with plastic wrap, pressing it directly onto the surface to keep the topping crisp. It keeps four days refrigerated, though I’ve never witnessed a pan survive that long. After day two, the topping softens but the flavor deepens, tasting like strawberry shortcake that’s been hanging out with cheesecake.
Freezer Friendly
Cut into squares, wrap each in plastic and foil, and freeze up to two months. Thaw overnight in the fridge, then revive in a 325°F oven for ten minutes. Microwaving from frozen turns the fruit into rubber, so resist the convenience button.
Best Reheating Method
Place a square on parchment and warm in a 300°F oven for eight minutes. Add a tiny splash of water on the parchment — it steams back to perfection, reviving the saucy fruit without drying the edges. Your kitchen will smell like you just baked it fresh, and no one has to know you’re polishing off day-three leftovers in secret.