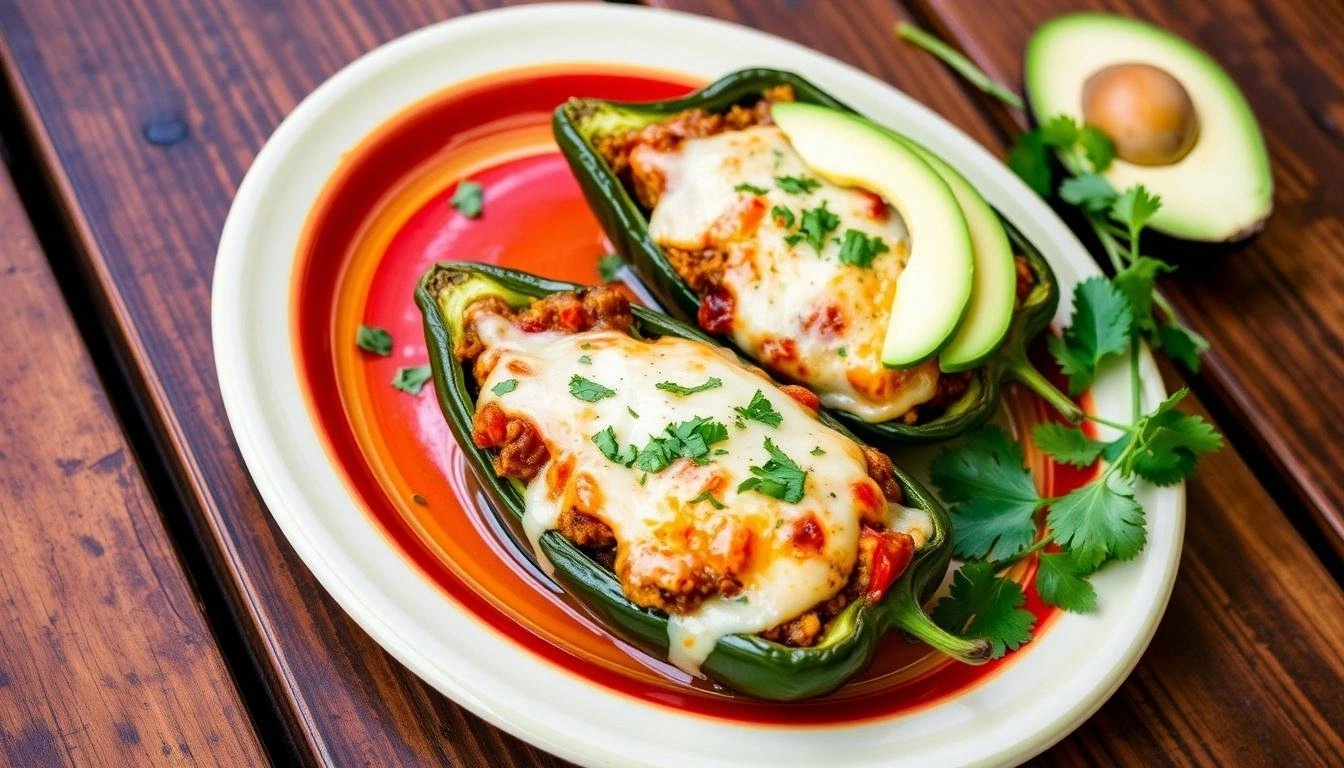
I remember the night I almost set my kitchen on fire while attempting to create a “perfect” stuffed poblano pepper. The peppers were charred, the cheese melted into a gooey mess, and I stared at the stove, realizing I’d forgotten to pre‑roast the peppers. That disaster became the spark that ignited my obsession with the dish that now goes by the name “Stuffed Poblano Peppers: A Mou.” I was determined to turn a culinary blunder into a culinary triumph, and the result is a recipe that balances smoky heat, creamy cheese, and a subtle herbaceous finish that will make your taste buds sing. I dare you to taste this and not go back for seconds, because once you try the first bite, the rest will feel like a promise you’re about to keep. Picture yourself pulling the peppers out of the oven, the kitchen smelling incredible, the steam curling like a fragrant halo, and a crowd of friends already lining up for the next plate. I’ve tweaked every element—from the pepper selection to the cheese blend—to create a flavor profile that is hands down the best version you’ll ever make at home. Let me walk you through every single step — by the end, you’ll wonder how you ever made it any other way.
The first thing that sets this dish apart is the way I treat the peppers. Instead of the usual raw approach, I lightly char them on the grill, giving them a smoky char that deepens the flavor profile and creates a subtle crunch that contrasts with the creamy filling. The char also helps to soften the pepper walls, making them easier to stuff without tearing. I’ve learned that a good char is achieved by a quick 2‑minute per side, just enough to blister the skin without burning. The result is a pepper that looks like a piece of art, with a glossy sheen that invites you to dig in. This technique also locks in the pepper’s natural sweetness, creating a harmonious balance with the savory cheese mixture. I’ve found that the charred skin adds a smoky undertone that lingers on the tongue, making each bite a complex experience. It’s a small step that makes a huge difference, and I’ve seen people ask me how I do it; it’s all about timing and a good heat source.
Next, let’s talk cheese. I’m a firm believer that the right blend of cheeses turns a simple filling into a creamy, gooey masterpiece. I use a combination of sharp cheddar for bite, Monterey Jack for meltiness, and a touch of smoked mozzarella for that smoky depth. The cheddar provides a sharp, tangy kick that cuts through the richness, while the Monterey Jack offers a buttery smoothness that coats the tongue like velvet. Smoked mozzarella adds a subtle smoky aroma that echoes the charred pepper, creating a cohesive flavor narrative. When you bite into the filling, you’ll hear that satisfying crack of the cheese as it gives way to the warm, savory center. The cheese blend is the heart of the dish, and each component is chosen to complement the others, creating a symphony of textures and flavors that dance across the palate.
The filling itself is a medley of textures and flavors that work together to create a mouth‑watering experience. I combine fluffy rice, hearty black beans, diced onions, minced garlic, and fresh tomatoes to add bite and freshness. The rice provides a subtle base that absorbs the spices, while the beans add protein and a creamy texture that balances the cheese. The onions and garlic add sharpness and depth, creating an aromatic foundation that enhances the pepper’s natural sweetness. Fresh tomatoes bring acidity and juiciness, cutting through the richness of the cheese. I finish the mixture with a blend of cumin, smoked paprika, chili powder, and a dash of cayenne for heat. The spices are toasted briefly to release their essential oils, creating a fragrant aroma that fills the kitchen. The result is a filling that is complex, satisfying, and utterly irresistible.
The finishing touches bring the dish to life. I drizzle a squeeze of lime over the stuffed peppers before baking, which adds a bright citrus note that lifts the overall flavor. I sprinkle chopped cilantro on top for a fresh herbal finish, and a dollop of sour cream on the side provides a cool, creamy contrast that balances the heat. The combination of lime, cilantro, and sour cream creates a vibrant, layered flavor that keeps every bite exciting. I also add a small amount of chopped fresh jalapeño to the filling for those who want an extra kick of heat. The peppers bake until the cheese is bubbly and golden, the edges slightly crisp, and the filling is steaming hot. The final result is a dish that looks beautiful, smells divine, and tastes like pure comfort.
But this recipe isn’t just about flavor. It’s also about the experience of cooking and sharing. I’ve spent countless hours tweaking the recipe to make it foolproof for beginners, while still providing depth for seasoned cooks. The method is straightforward, but each step is crucial to achieving the perfect balance of textures and flavors. I’ll walk you through the process step by step, highlighting the techniques that make this dish stand out. I’ll also share insider tricks, variations, and storage tips so you can enjoy this dish anytime. And if you’re looking for a crowd‑pleaser, this recipe delivers—guests will rave about the smoky char, the creamy cheese, and the bright, fresh finish. So let’s dive in and create a dish that will become a staple in your culinary repertoire.
What Makes This Version Stand Out
- Charred Perfection: The quick grill char adds a smoky depth that elevates the pepper’s natural sweetness, creating a flavor profile that’s both complex and comforting.
- Cheese Harmony: A trio of cheddar, Monterey Jack, and smoked mozzarella delivers a melt‑in‑your‑mouth texture with a sharp, buttery bite that keeps every bite interesting.
- Spice Balance: Toasted cumin, smoked paprika, and a pinch of cayenne create a subtle heat that’s never overpowering, allowing the pepper’s flavor to shine.
- Freshness Boost: Lime juice, cilantro, and a splash of sour cream add bright, refreshing notes that cut through the richness of the cheese and beans.
- Texture Contrast: The crispy charred edges of the pepper contrast with the creamy filling, giving a satisfying bite that’s both crunchy and silky.
- Make‑Ahead Friendly: The dish can be assembled ahead of time and frozen, making it a convenient weeknight dinner or a last‑minute dinner party staple.
- Kid‑Friendly Appeal: The mild heat and cheesy filling make it a hit with kids, while the sophisticated flavor profile satisfies grown‑up palates.
- Visual Appeal: The vibrant green peppers, golden cheese, and fresh herbs create a dish that looks as good as it tastes, perfect for Instagram or dinner parties.
Alright, let's break down exactly what goes into this masterpiece...
Inside the Ingredient List
The Flavor Base
The foundation of any great stuffed pepper is the flavor base. This recipe starts with 4 medium poblano peppers, each carefully washed, seeded, and charred on a grill or skillet. The char is the secret to depth; it brings a subtle smokiness that complements the pepper’s natural sweetness. If you skip the char, you’ll miss that complex undertone that makes this dish stand out. For best results, choose peppers that are firm and glossy, indicating freshness.
Next is the rice, which serves as a neutral canvas that absorbs the spices and adds body to the filling. I recommend using 1 cup of cooked white or brown rice, depending on your texture preference. Brown rice adds a nuttier flavor and a firmer bite, while white rice offers a lighter, fluffier base. If you’re short on time, pre‑cooked rice from the grocery store works fine, but be sure to fluff it before mixing. Rice also helps bind the filling, preventing it from spilling out during baking.
The Texture Crew
Black beans are the next key player. I use 1 cup of drained and rinsed black beans, which add protein, creaminess, and a subtle earthy flavor. If you’re vegan or prefer a lighter filling, you can substitute chickpeas or lentils, but be aware they’ll change the texture slightly. Beans also help to thicken the mixture, creating a cohesive stuffing that stays together when baked.
Onions and garlic bring sharpness and depth. I dice 1/2 cup of onion and mince 2 cloves of garlic, then sauté them in 2 tablespoons of olive oil until they’re translucent and fragrant. This step is essential; raw onions and garlic can be harsh, but sautéing softens them and releases their flavors. If you’re sensitive to raw garlic, a quick sauté will mellow the bite. These aromatics lay the aromatic foundation for the filling.
The Unexpected Star
Fresh tomatoes add a burst of juiciness and acidity that cuts through the richness of the cheese. I dice 1/2 cup of ripe tomatoes, which provide a subtle sweetness and a fresh bite. If tomatoes aren’t in season, canned diced tomatoes can work, but be sure to drain them well to avoid a watery filling. The tomatoes also add color, turning the filling into a vibrant mosaic that’s visually appealing.
The spice blend—1 teaspoon ground cumin, 1 teaspoon smoked paprika, 1/2 teaspoon chili powder, and a pinch of cayenne—creates a warm, aromatic base. I toast the spices in the same pan with the onions and garlic for about 30 seconds, which releases their essential oils and enhances their flavors. If you’re not a fan of heat, you can reduce or omit the cayenne, but the cumin and smoked paprika will still give the dish depth.
The Final Flourish
Citrus and herbs bring brightness. I squeeze the juice of one lime over the peppers before baking, which adds a zesty kick that lifts the dish. I also sprinkle chopped cilantro on top for a fresh herbal finish that adds color and aroma. A dollop of sour cream on the side provides a cool, creamy contrast that balances the heat. If you’re looking for a vegan twist, use a plant‑based yogurt or a drizzle of coconut milk instead of sour cream.
Everything’s prepped? Good. Let's get into the real action...
The Method — Step by Step
- Preheat your oven to 375°F (190°C). While the oven heats, gather all your ingredients and set up a clean work surface. This ensures you’re organized and can focus on each step without rushing. If you’re short on time, have the rice and beans pre‑cooked and ready to go.
- Char the poblano peppers on a grill or in a hot skillet for 2 minutes per side until the skins blister and darken. The goal is a subtle smokiness without burning. After char, place the peppers on a cutting board, cut a small slit along the top, and carefully peel back the skin. This creates a clean cavity for stuffing.
- Sauté the diced onions and minced garlic in 2 tablespoons of olive oil over medium heat until translucent and fragrant, about 3–4 minutes. Stir frequently to prevent burning. This step brings out the aromatic depth that underpins the filling.
- Add the toasted spices—cumin, smoked paprika, chili powder, and cayenne—to the pan and cook for an additional 30 seconds, stirring constantly. The brief toasting releases the essential oils, giving the spices a richer, more complex flavor profile.
- In a large bowl, combine the cooked rice, black beans, sautéed onion and garlic, diced tomatoes, and the spice mixture. Stir until everything is evenly coated and the mixture is moist but not soupy. This is the filling that will make the peppers sing.
- Add the shredded cheddar and Monterey Jack cheeses to the mixture, folding them in gently until melted and well distributed. The cheeses should be warm enough to melt but not fully liquefied, ensuring a smooth, cohesive filling.
- Fill each charred pepper cavity with the cheese‑rice mixture, packing it firmly but not over‑stuffing. The peppers should be snug, but you don’t want the filling to spill over when baked. A small spoon or spatula works best for this step.
- Place the stuffed peppers on a baking sheet lined with parchment paper. Drizzle a little olive oil over them and sprinkle with a pinch of salt. This helps the peppers brown slightly and adds a subtle sheen.
- Bake in the preheated oven for 25–30 minutes, or until the cheese is bubbly and golden, and the peppers are tender. The edges should pull away from the filling, indicating the peppers are cooked through.
- Remove from the oven and let the peppers rest for 5 minutes. While they rest, squeeze fresh lime juice over the top and sprinkle chopped cilantro. The citrus brightens the dish, and the cilantro adds a fresh herbal note.
- Serve hot with a side of sour cream or a dollop of plant‑based yogurt if you’re vegan. The cool, creamy topping balances the heat and richness of the filling. Plate the peppers with a drizzle of olive oil and a sprinkle of extra cheese for an indulgent finish.
That's it — you did it. But hold on, I've got a few more tricks that'll take this to another level...
Insider Tricks for Flawless Results
The Temperature Rule Nobody Follows
Many people bake stuffed peppers at 400°F, but that can cause the cheese to burn before the pepper is fully cooked. I’ve found that 375°F (190°C) is the sweet spot that allows the filling to melt evenly while the pepper walls soften without scorching. Keep an eye on the cheese; it should be bubbling but not browned. If you notice the edges are browning too quickly, lower the temperature by 10–15°F and continue baking.
Why Your Nose Knows Best
The aroma of toasted spices is a reliable indicator that your filling is developing the right depth. As soon as the cumin and paprika release their oils, the kitchen fills with a warm, earthy scent that signals everything is on track. If the scent is muted, give the pan a quick stir and let it toast for a few more seconds. The aroma is a subtle cue that the spices are not only cooked but also fully integrated.
The 5-Minute Rest That Changes Everything
Letting the peppers rest after baking is crucial. During the 5 minutes of rest, the filling settles, making it easier to slice and serve. The cheese also firms slightly, preventing it from oozing onto the plate. If you rush to plate immediately, you risk a messy presentation. Resting also allows the flavors to meld, giving the dish a cohesive taste profile.
Keep the Char Alive
If you’re in a hurry, you can finish the char in the oven by placing the peppers on a rack and broiling for 1–2 minutes after stuffing. This quick broil reactivates the smoky char, giving the dish a fresh finish without overcooking the filling. Watch closely; the broiler can quickly brown the cheese if left too long.
The Lime‑Cilantro Finish
Squeezing lime over the hot peppers releases essential oils from the lime zest, creating a bright, citrusy aroma that lifts the dish. Adding cilantro right before serving keeps the herb fresh and vibrant. The combination of lime and cilantro provides a bright counterpoint to the rich cheese and beans, creating a balanced flavor profile.
Creative Twists and Variations
This recipe is a playground. Here are some of my favorite ways to switch things up:
Mexican Street Tacos Twist
Swap the rice for corn tortillas, fill the peppers with the same cheese and bean mixture, then top with fresh salsa and a squeeze of lime. The result is a portable, street‑food‑style dish that’s perfect for picnics or potlucks.
Vegan Delight
Replace the cheese with a plant‑based cheddar alternative and use coconut milk instead of sour cream. Add a handful of diced bell peppers for extra crunch. This version maintains the same flavor profile while keeping it plant‑based.
Mediterranean Fusion
Swap the black beans for chickpeas, add diced kalamata olives, and sprinkle feta cheese on top before baking. The Mediterranean flavors mingle with the Mexican base for a unique cross‑cuisine experience.
Spicy Jalapeño Kick
Add finely chopped fresh jalapeño to the filling for an extra burst of heat. Keep the rest of the recipe the same, and you’ll have a fiery version that’s sure to impress.
Cheese‑Heavy Indulgence
Double the amount of cheddar and Monterey Jack for a richer, more indulgent dish. The extra cheese will melt into a gooey, creamy center that’s hard to resist.
Savory Breakfast Bowl
Serve the stuffed peppers over a bed of sautéed spinach and a fried egg for a hearty breakfast. The combination of protein and greens makes for a satisfying morning meal.
Storing and Bringing It Back to Life
Fridge Storage
Store cooked stuffed peppers in an airtight container in the refrigerator for up to 3 days. Keep them in a shallow dish to ensure even cooling. When ready to serve, reheat in a preheated oven at 350°F (175°C) for 10–12 minutes, or until heated through.
Freezer Friendly
Freeze the stuffed peppers in a freezer‑safe container or zip‑lock bag for up to 2 months. Thaw overnight in the refrigerator before reheating. To reheat, bake at 375°F (190°C) for 15–20 minutes or until heated through. The texture remains firm, and the flavors stay vibrant.
Best Reheating Method
The best way to reheat is in the oven, which preserves the crisp edges and melts the cheese evenly. Add a splash of water or broth to the baking dish to create steam, preventing the filling from drying out. Cover loosely with foil for the first 5 minutes, then remove the foil to allow the cheese to brown slightly.