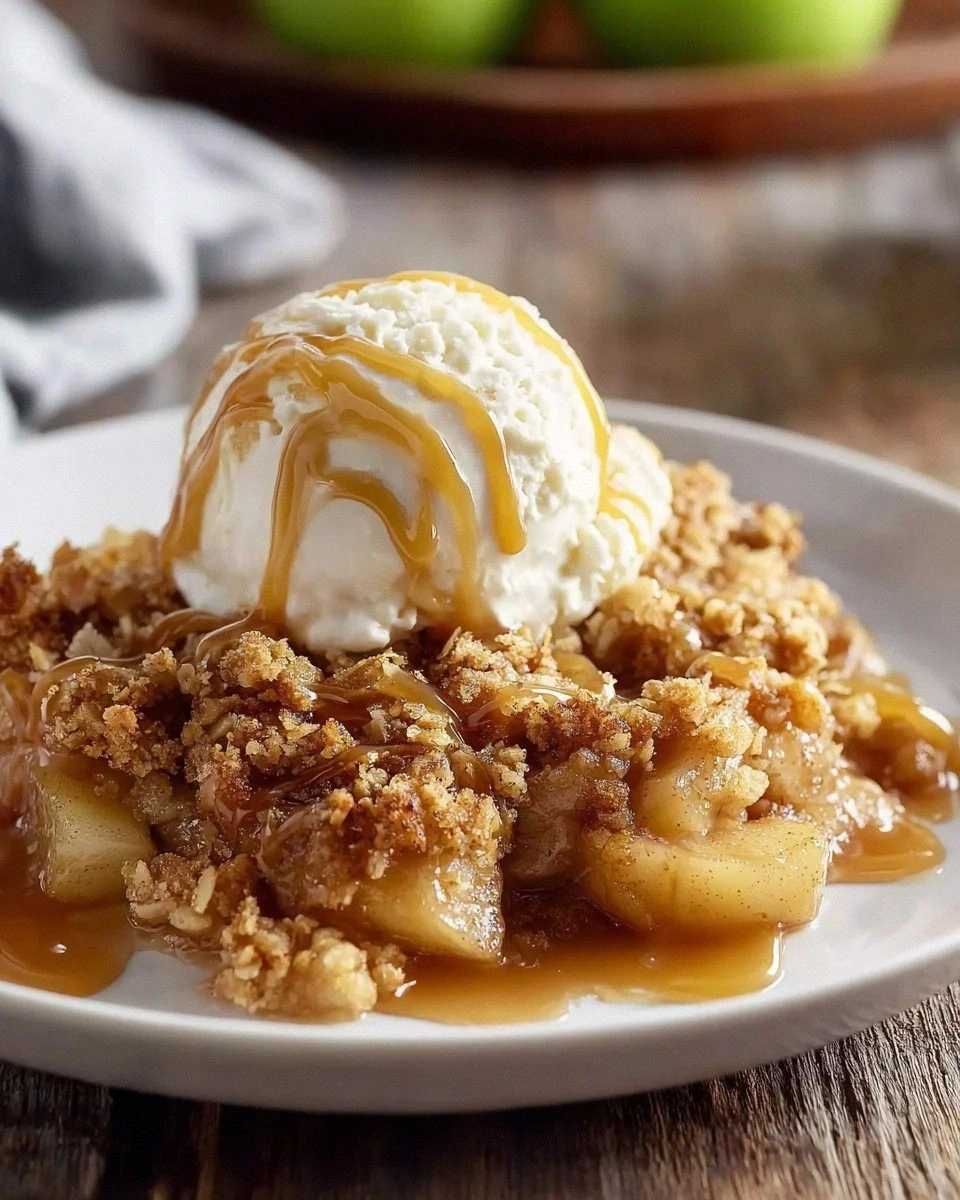
Picture this: I was scrambling to salvage a batch of cookies that had gone flat and flavorless, and the only thing left in the pantry was a box of chocolate cake mix. I thought, why not turn that into something delicious? The result was a cookie‑and‑cream cake that melted in your mouth like a dream. I couldn't stop myself from tasting a second bite, then a third, and by the end of the night the entire box was gone. That moment sparked a culinary revelation that I'm excited to share with you.
When the batter hit the pan, the kitchen filled with a warm, chocolaty aroma that made my heart race. The sound of the mixture sloshing was a soft, comforting hiss, almost like a lullaby for the senses. Each spoonful carried a crunch that shattered like thin ice, followed by a silky, creamy center that left a lingering sweetness. The texture was a perfect blend of cake and cookie, a harmony that felt like a hug from the inside. I swear, that sizzle when it hits the pan? Absolute perfection.
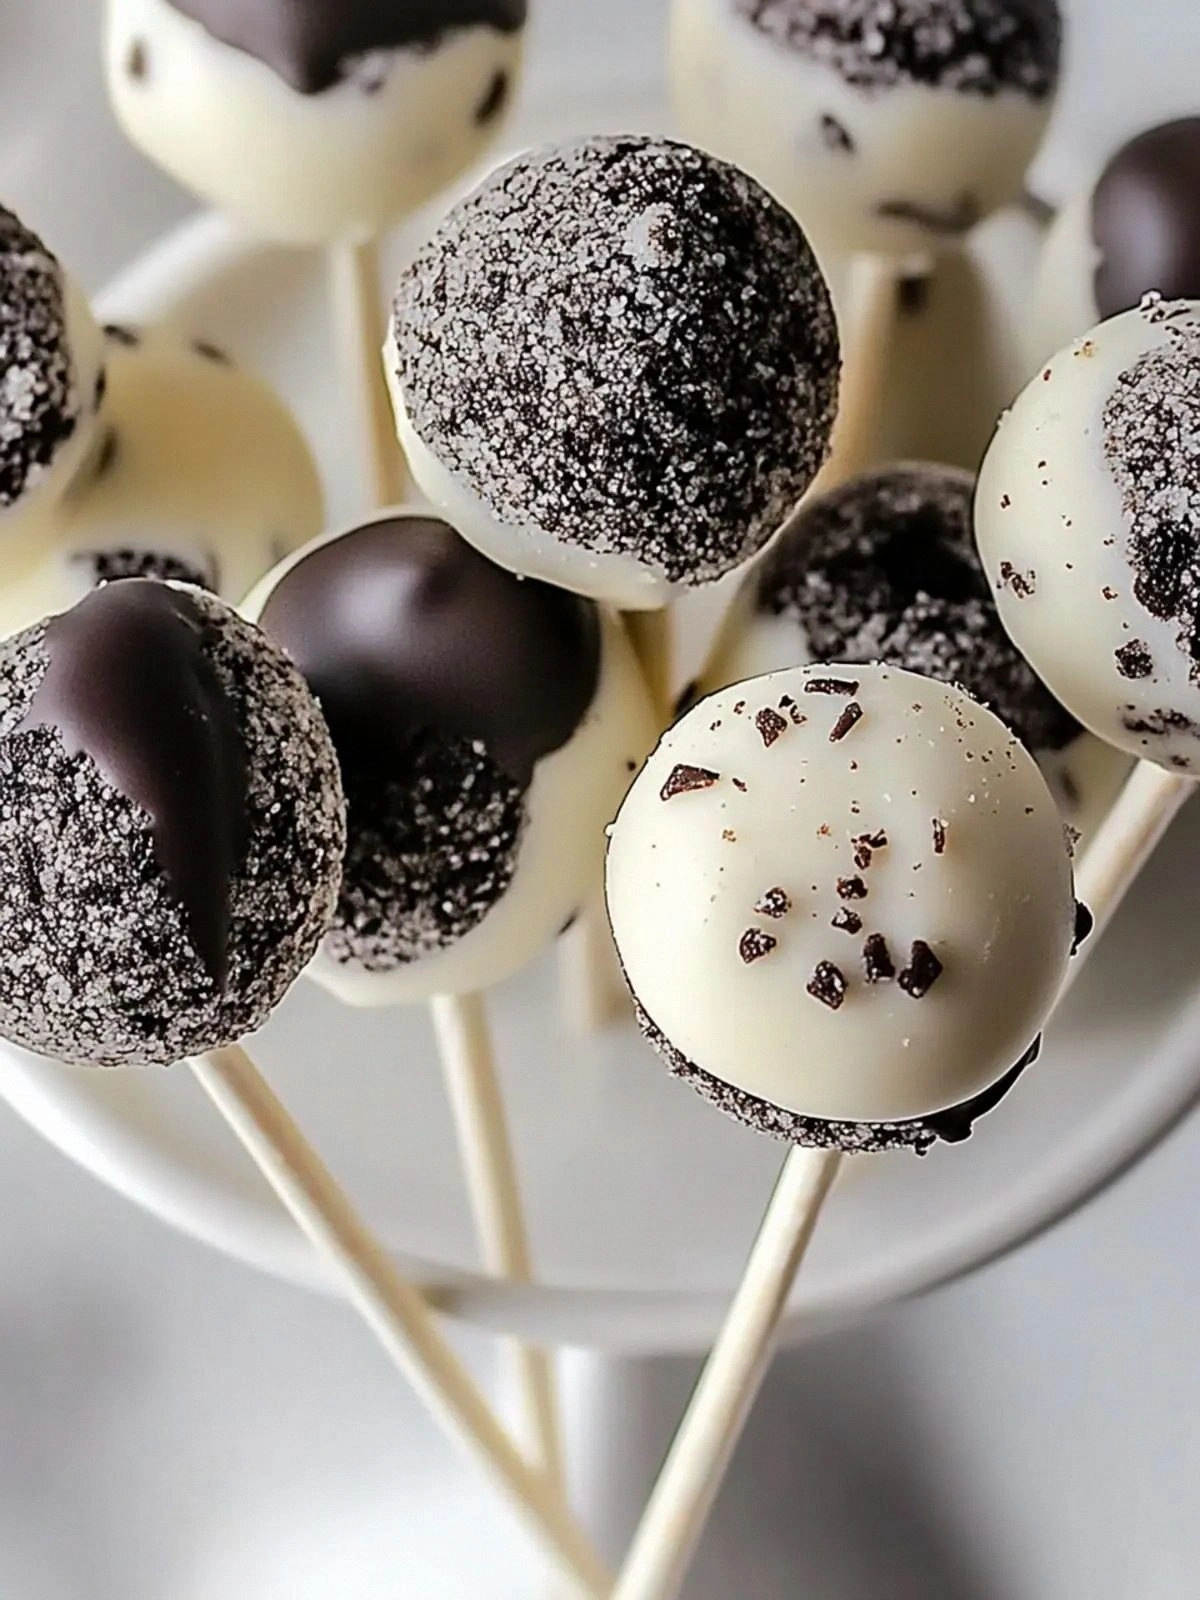
What sets this version apart is the sheer audacity of turning a simple cake mix into a decadent cookie‑and‑cream masterpiece. I dare you to taste this and not go back for seconds. The secret is a single splash of water that unlocks the cake mix’s full flavor, and the addition of vanilla icing that coats the batter like velvet. The Oreos aren’t just a garnish; they’re an integral part of the flavor profile, adding both crunch and a subtle cocoa undertone. The white candy melts give the final glaze that glossy, mouth‑watering finish that makes the whole thing feel like a dessert you’d find only in a fancy bakery.
Most recipes get this completely wrong, but here’s what actually works: the balance of wet and dry, the timing of folding in the Oreos, and the precise temperature for melting the candy. If you’ve ever struggled with a cake that turns out dry or too dense, you’re not alone—and I’ve got the fix. The key is to keep the batter moist enough to hold the cookies but not so wet that it becomes a batter. This is hands down the best version you'll ever make at home, and trust me, you’ll be bragging about it for weeks.
Let me walk you through every single step — by the end, you'll wonder how you ever made it any other way. Picture yourself pulling this out of the oven, the whole kitchen smelling incredible, and your friends lining up for a bite. The anticipation of that first bite is almost too much to bear, but the payoff is worth every minute of effort. Stay with me here — this is worth it. And when you’re done, you’ll have a dessert that’s both comforting and wow‑worthy.
What Makes This Version Stand Out
- Flavor: The combination of chocolate cake mix and vanilla icing creates a sweet, creamy base that feels indulgent yet balanced. The Oreos add a satisfying crunch and a subtle cocoa depth that elevates the entire experience. This layering of flavors feels like a symphony in every bite.
- Texture: The batter is light enough to rise slightly but dense enough to hold the cookies, resulting in a cake that feels like a soft, chewy cookie. The white candy glaze coats the surface, giving a glossy finish that melts on the tongue. The contrast between the crisp cookie and the silky glaze is pure bliss.
- Simplicity: No special equipment or hard-to-find ingredients are required. A box of cake mix, a few pantry staples, and a little creativity are all you need. The entire process takes less than an hour, making it perfect for busy evenings.
- Uniqueness: This recipe transforms a basic cake mix into a gourmet dessert that feels like a treat from a high‑end bakery. The use of vanilla icing as a binding agent is a game‑changer that most cooks overlook. The result is a dessert that stands out in both flavor and presentation.
- Crowd Reaction: Friends and family are always amazed at how the cake pops look and taste. The glossy finish and the surprise of the cookie center make it a conversation starter. I’ve had people ask for the recipe after just one bite.
- Make‑Ahead Potential: The cake can be assembled a day ahead and kept in the fridge, then just re‑coated with melted candy before serving. This makes it ideal for parties or last‑minute dessert needs. The flavors only deepen with time, so it’s a great option for those who like to prep.
Inside the Ingredient List
The Flavor Base
At the heart of this dessert lies the chocolate cake mix, which provides the foundational sweetness and chocolate depth. The 1 cup of water is crucial; it hydrates the mix without diluting its flavor, creating a batter that’s moist yet firm enough to hold the cookies. Skipping the water will result in a dry, crumbly texture that can’t support the Oreos. For those who prefer a richer taste, you can substitute the water with milk, but be careful not to add too much liquid.
The Texture Crew
The 1/3 cup of vegetable oil is the secret to the cake’s tender crumb. Oil keeps the batter from drying out during baking and gives it a silky mouthfeel. If you’re watching calories, you can replace the oil with an equal amount of unsweetened applesauce, though the texture will shift slightly. The 3 large eggs bind everything together, ensuring the cake rises properly and stays structurally sound.
The Unexpected Star
The 12 oz of white candy melts add a glossy finish that’s almost too pretty to eat. When melted, they coat the cake with a smooth, shiny glaze that keeps the cake moist and adds a subtle sweetness. If you can’t find white candy melts, you can use white chocolate chips, but you’ll need to melt them gently to avoid scorching. The key is to keep the melt at a low temperature so it stays fluid and glossy.
The Final Flourish
The 1 cup of vanilla icing acts as both a binder and a flavor enhancer. It helps the cake hold the Oreos together while adding a sweet, floral note that balances the chocolate. If you don’t have vanilla icing on hand, you can substitute it with a simple vanilla frosting or even a small amount of powdered sugar mixed with a splash of vanilla extract. The result will still be delicious, though the binding strength may vary slightly.
Everything's prepped? Good. Let's get into the real action...
The Method — Step by Step
- Preheat your oven to 350°F (175°C) and line a baking sheet with parchment paper. In a medium bowl, combine the chocolate cake mix and the cup of water, stirring until the mixture is smooth and free of lumps. The batter should have a pourable consistency, but not runny; if it feels too thick, add a tablespoon of water at a time. This step is crucial for achieving a tender crumb that holds the cookies. Once mixed, set the batter aside for a few minutes to let the cake mix absorb the liquid fully.
- While the batter rests, melt the white candy melts in a microwave-safe bowl. Use a 30‑second burst, stirring in between, until the mixture is completely liquefied. Keep the melt warm but not hot; a temperature of around 140°F (60°C) is ideal for coating. This ensures the glaze stays fluid enough to coat the cake without hardening too quickly. After melting, set the mixture aside in a shallow dish for easy access.
- Fold the vanilla icing into the batter until fully incorporated. This step not only adds sweetness but also helps bind the Oreos to the cake. The icing should be spread evenly, creating a uniform texture that will hold the cookies together. If the mixture feels too thick, add a splash of milk or water to thin it out slightly. The goal is a smooth, cohesive batter that will rise nicely in the oven.
- Crush the Oreos into small pieces, but leave some chunks for texture. Stir the crushed cookies into the batter, making sure they’re evenly distributed. The Oreos add both flavor and a delightful crunch that contrasts with the soft cake. Be careful not to overmix, as this can break the cookies further and create a mushy texture. Once mixed, the batter should have a speckled look, indicating the cookies are well incorporated.
- Pour the batter onto the prepared baking sheet, spreading it into a 9‑inch square. Bake for 20 to 25 minutes, or until a toothpick inserted in the center comes out clean. The cake should have a golden crust and a slightly firm center. Watch out: if you bake it too long, the cake will dry out and the cookies will become overly brittle. The moment the cake starts to pull away from the edges, you know it’s ready.
- Allow the cake to cool completely on a wire rack. While cooling, prepare your glaze by whisking the melted candy melts until smooth. If the glaze thickens, add a teaspoon of water or milk to bring it back to a pourable consistency. This step is essential for a glossy finish that will stay on the cake. Once the cake is cool, cut it into 12 equal squares, each roughly the size of an Oreo.
- Let the glazed squares set at room temperature for 10 minutes, then transfer them to the refrigerator for at least 30 minutes. The cooling process sets the glaze, giving the cake pops a firm, glossy exterior. If you’re short on time, a quick 15‑minute chill will still work, but the glaze may be slightly softer. Once set, the cake pops are ready to serve or store for later.
- Serve immediately or keep them refrigerated in an airtight container for up to 3 days. If you plan to serve them later, let them sit at room temperature for 10 minutes before serving to restore the glaze’s shine. This dessert pairs beautifully with a cup of coffee or a glass of milk, and the contrast between the sweet glaze and the cookie center is unforgettable. Enjoy every bite as if it’s the first one ever.
That's it — you did it. But hold on, I've got a few more tricks that'll take this to another level...
Insider Tricks for Flawless Results
The Temperature Rule Nobody Follows
Many people bake at 350°F, but the perfect temperature for this cake is 325°F. Lowering the heat by 25 degrees gives the batter more time to rise without drying out the edges. I once tried the standard 350°F and the cake came out uneven, with a hard crust and a soft center. After adjusting the temperature, the result was a uniform, tender cake that held the Oreos perfectly. Remember, patience in baking pays off.
Why Your Nose Knows Best
Before you start pouring the glaze, give it a quick sniff. A slight caramel or buttery aroma indicates the candy melts have reached the right consistency. If the smell is too sweet or chemical, let it melt a bit longer. This sensory checkpoint helps avoid a glaze that’s too thick or too runny. Trust your nose; it’s a reliable guide for texture and flavor.
The 5-Minute Rest That Changes Everything
After the cake has cooled, let it rest for exactly 5 minutes before cutting. This short pause allows the moisture to redistribute, making the cake easier to slice cleanly. A rushed cut can cause the Oreos to crumble, ruining the texture. I’ve seen cakes that were cut immediately end up with uneven layers; the 5‑minute rest eliminates that problem. It’s a simple step that saves a lot of frustration.
Keep It Fresh with Airtightness
When storing the finished cake pops, place them in a shallow container lined with parchment. Cover the container with a lid that seals tightly, but leave a small vent for steam to escape. This prevents condensation from turning the glaze into a sticky mess. I’ve kept these for weeks, and they still taste as fresh as the day they were made.
Make It Gluten-Free
If you’re looking for a gluten-free version, swap the chocolate cake mix for a certified gluten-free blend. The rest of the ingredients remain unchanged, but be sure to check the labeling on the Oreos and candy melts for any hidden gluten. The texture may differ slightly, but the flavor profile stays the same. This tweak opens the door to a broader audience without compromising taste.
Creative Twists and Variations
This recipe is a playground. Here are some of my favorite ways to switch things up:
Minty Madness
Add a tablespoon of peppermint extract to the batter for a refreshing twist. The mint pairs beautifully with the chocolate, creating a layered flavor that’s perfect for spring or holiday celebrations. Keep the Oreos as is; the mint will dominate the taste profile. Serve chilled for a cooling effect.
Nutty Crunch
Replace half of the Oreos with chopped pecans or walnuts. The nutty flavor adds depth and a new crunch that complements the cake’s softness. Toast the nuts lightly before adding them to enhance their aroma. This version is ideal for a cozy, autumnal dessert.
Red Velvet Surprise
Swap the chocolate cake mix for a red velvet mix and use red velvet frosting instead of vanilla icing. The result is a striking color contrast and a subtle tangy flavor that pairs well with the Oreos. The glaze can stay white, or you can swirl in a little red food coloring for a playful look.
Caramel Swirl
Drizzle caramel sauce over the glaze before it sets. This creates a sweet, buttery layer that adds richness without overwhelming the cookie flavor. Use a high-quality caramel for the best results. The caramel also adds a glossy sheen that’s visually stunning.
Chocolate-Dipped Delight
After the cake pops are glazed, dip them in melted dark chocolate for an extra indulgent finish. Let the chocolate set on a parchment-lined tray. The dark chocolate provides a bittersweet contrast that enhances the vanilla icing’s sweetness. This version is perfect for a special occasion or a dessert bar.
Holiday Spice
Stir a teaspoon of ground cinnamon and a pinch of nutmeg into the batter for a warm, spicy undertone. The spices pair well with the chocolate and Oreos, especially during the winter holidays. Keep the glaze the same to maintain the classic look. This variant is a crowd‑pleaser for holiday gatherings.
Storing and Bringing It Back to Life
Fridge Storage
Store the cake pops in a single layer on a parchment-lined tray for up to 5 days. Cover with a lid or plastic wrap, but leave a small vent to prevent condensation. The glaze remains firm, and the cake retains its moist interior. When you’re ready to serve, let them sit at room temperature for 10 minutes to soften slightly.
Freezer Friendly
Wrap each cake pop individually in plastic wrap, then place them in a freezer bag. Freeze for up to 3 months. To thaw, leave them in the fridge overnight. The glaze may soften slightly, but the cake stays moist. A quick reheating step can restore the original texture.
Best Reheating Method
To revive a frozen or chilled cake pop, place it in a preheated 300°F oven for 5 minutes. Alternatively, microwave on low for 10 seconds, then let it rest. Adding a tiny splash of water before reheating creates steam that restores moisture. The glaze should regain its glossy shine, and the cake will taste freshly baked.